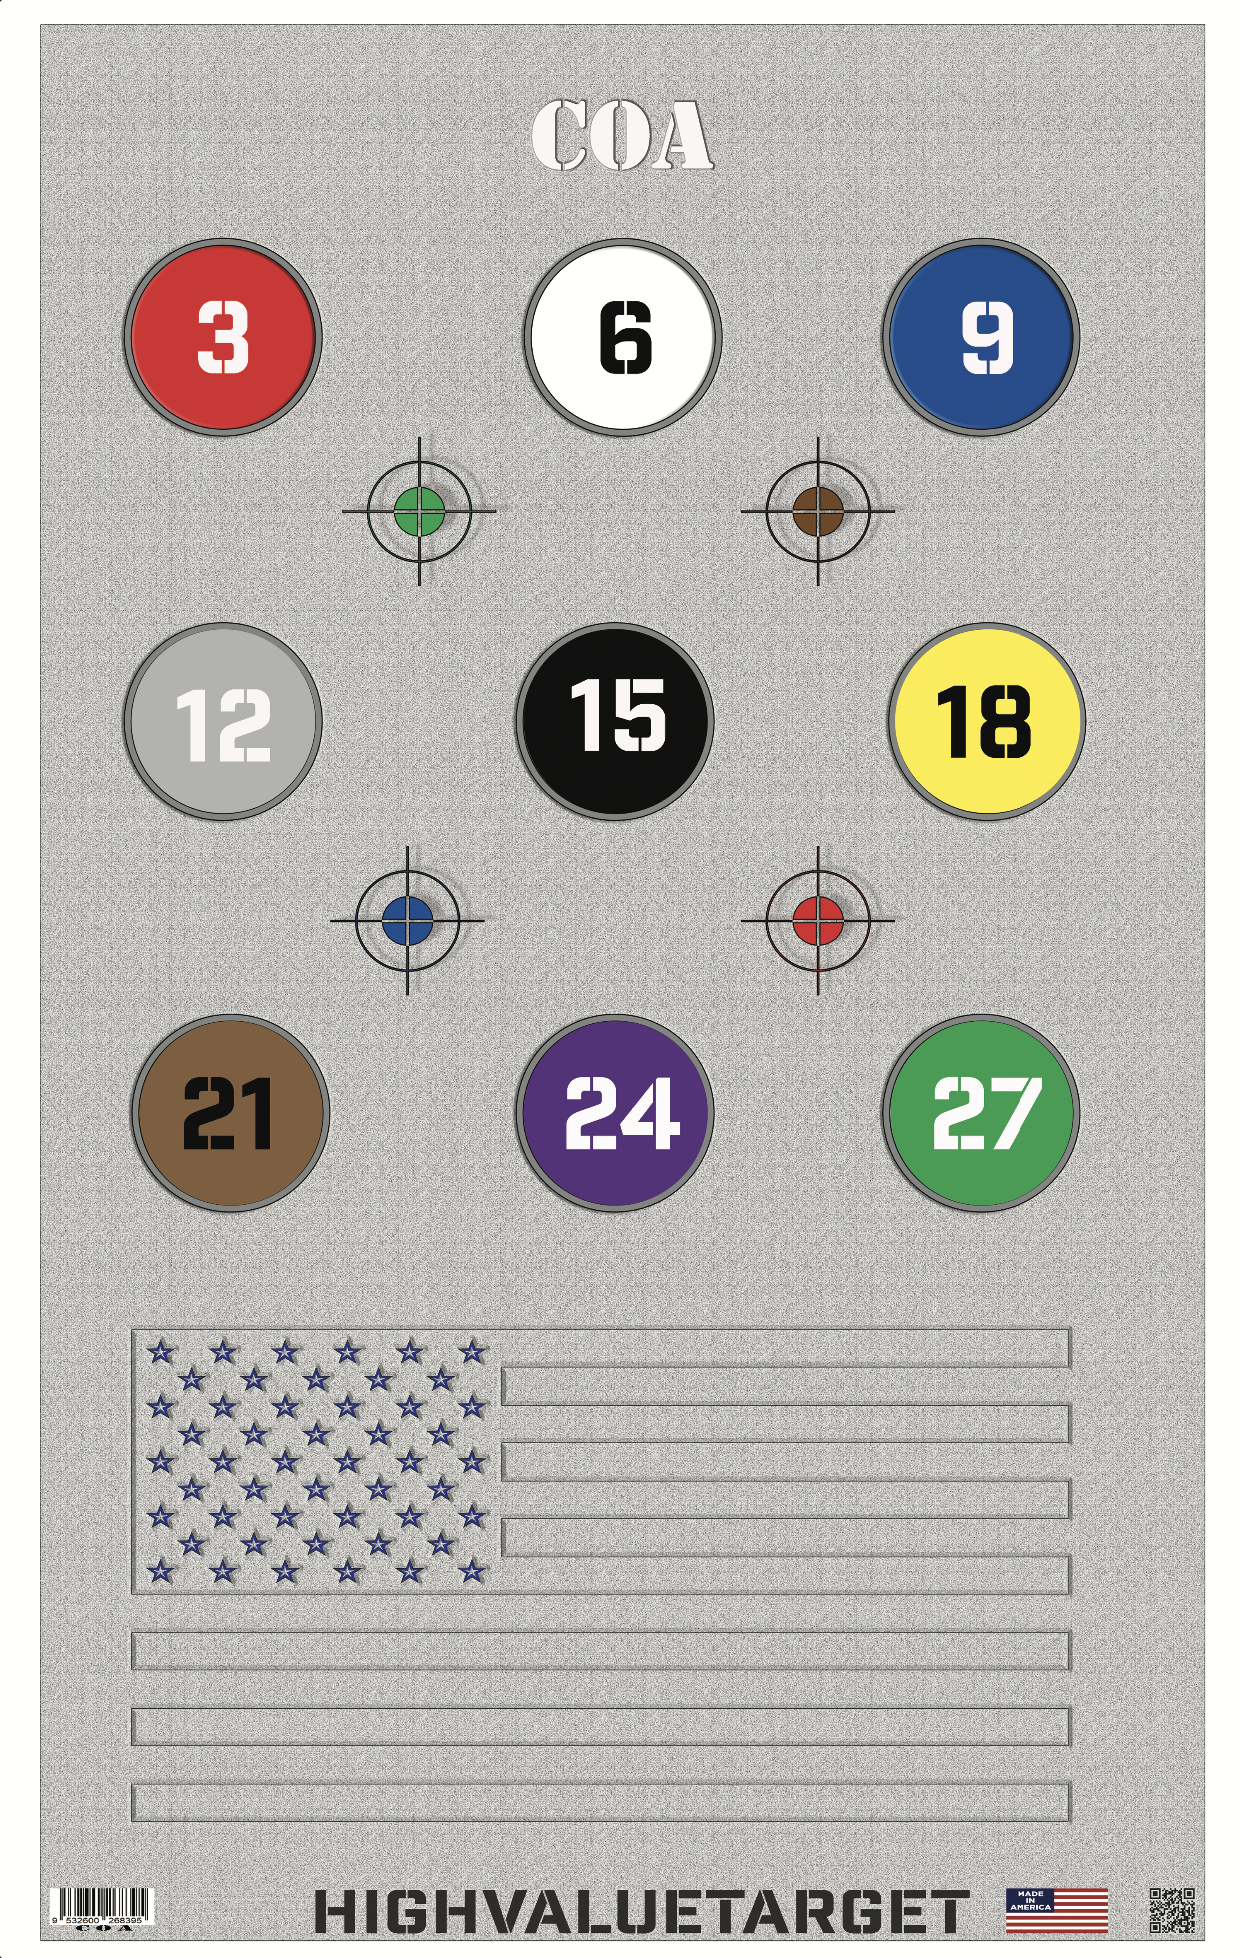
This target was developed at the guidance of Johnny Primo for use during his training courses. There are 13 aiming points consisting of 9, 3 inch circles and 4, 2.5 inch aiming points. (Author) as a former Navy SEAL, I respect how SF emphasizes thinking, even solving problems, while shooting. That is a difficult task to teach on the range and this is one of the few targets, if not the only target, that allows that to happen. Targets are training aides, and without the right training aides, some learning objectives are just lost in the sauce, impossible to be taught.
The purpose of the numbers:
- [Number Sequences] The numbers may be called in a sequence, such as, 27 - 15 - 3. The shooter will engage those 3 circles, in that order. This is made slightly more difficult when the shooter isn't looking at the target prior to the sequence being called out. For example, the shooter line is facing 90º to the left, or right of the targets and prepared to make a turn. The instructor calls out the sequence then (beep) and the shooter line safely turns to engage the targets as prescribed.
- [Advanced Thinking] Example (1) A math problem is called out, such as, 27 - 3 = (24). The shooters engage the circle depicting number 24. Example (2) 3 X 3 = (9) and the shooters engage circle number 9. Example (3) 15 + 3 = (18).
- [Colors Sequences] A sequence of colors is called out, such as, Red, White & Blue. It's up to the instructor calling the shots (pun intended) to decide how many rounds are fired into each aiming point. Typically, 1 or 2 is good number. The instructor may also call out a single color such as, blue. However, there are two blue aiming points diagonally opposite of each other. Colored aiming points Red, Blue, Brown and Green, all have coinciding aiming points.
- When the instructor is using all three methods of employing this target in conjunction with one another an unusual amount of thinking is going on. It's typical for students to get flustered and shoot random aiming points not even related to what was called out.
- (Tip 1) when engaging multiple aiming points learn to move the eyes to the next target before the muzzle moves. When this technique is being employed it's audibly noticeable. First, the sequence is shot very quickly (with practice) and there is noticeable cadence, like a metronome.
- (Tip 2) Red Dot Optics - red dots on handguns are normally sighted in at 25 yds, however if you sight it in at 7 yds, your bullet impact will pretty much be right on at the recommended 3-5 yd distance for this target AND bullet impacts should be on, or close at 50 yds. Red dots on rifles, are usually sighted in at 50, or 100, whatever that distance is, if your running drills at 3-10 yds with the rifle the bullet impacts will probably be a couple of inches off from where the "red dot" is showing on the target. This is known as, mechanical offset. To correct for this, and place the rounds squarely into the depicted aiming points, its necessary to aim approximately 2 inch's north of where the shooter desires the round to impact. This is typical for all CQC type shooting drills.
Leave a comment
This site is protected by hCaptcha and the hCaptcha Privacy Policy and Terms of Service apply.