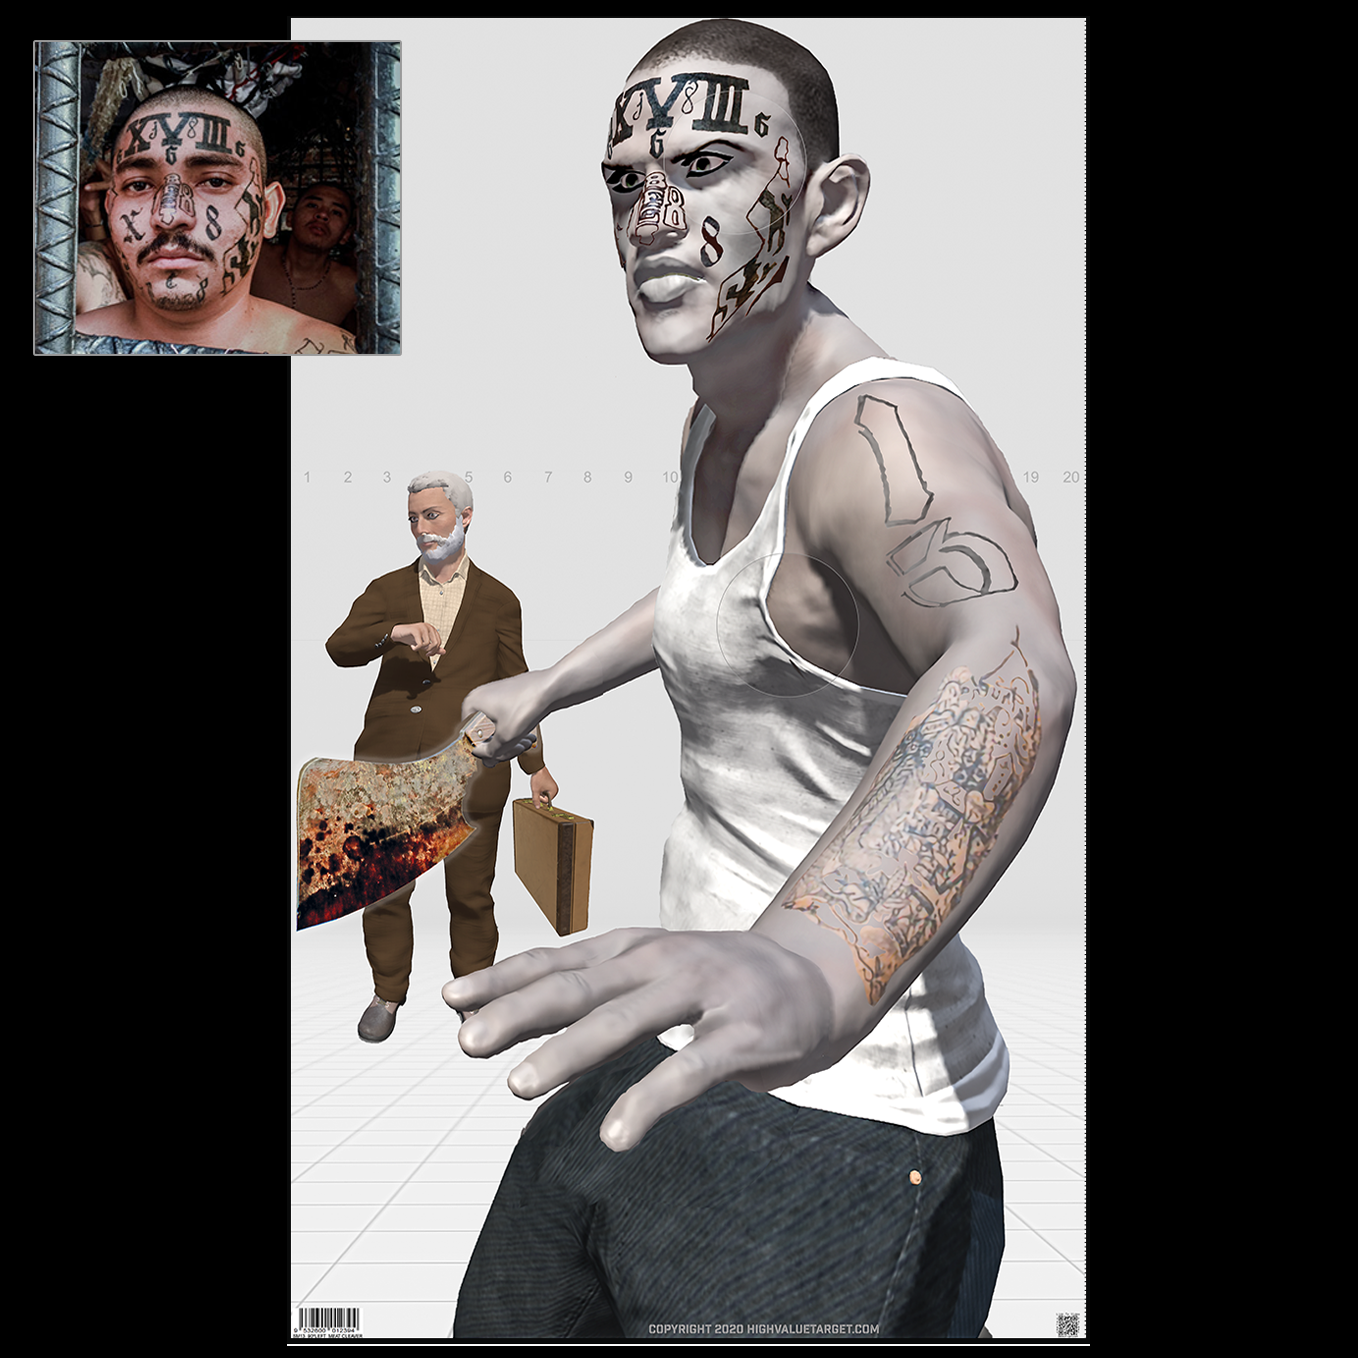
Target - MS13 w/ Suit
Drill # 1 - Step Left
Difficulty - Novice 🟦
Firearm - pistol
Distance - 3 yards (9 feet)
Ammo - 105 rounds
Gear - holster (optional)
*The information contained in this post is available as a digital download when you purchase this target.
Primary Proficiency Skills - 1) Image Processing Training 2) fundamental marksmanship 3) working from the holster of which ever type the shooter is using 4) stepping and shooting.
*Typical indoor range shooting stalls are not wide enough to accommodate taking a step and shooting. Additionally, most indoor ranges require clients to demonstrate safely drawing from the holster.
Prior recommended training - the techniques and methods related to safely drawing a loaded firearm from the holster of the type you will be working from. Techniques related to turning 90º left and right with the intention of shooting the target.
Description/ Scenario - You are at a street corner with two other friends, a gang member becomes enraged with something pertaining to one of your friends. Threatening words are directed towards all three of you and there is tremendous tension and a feeling of disease. The gang member approaches the three of you while locked onto one of your friends and pulls a large meat cleaver from inside his pants as he approaches. You believe all three of you are in mortal danger.
Your two other friends are not armed but you are. You check your background and realize there is man in the line of fire. You simultaneously step left and draw your pistol, which changed the shooters angle to threat thereby, clearing the background of the innocent bystander.
Firearms starting positions referred to during these shooting drills are the Holster, the Ready, the High Ready and the SUL position.

Lock & Load, make ready.
1) From the Ready position present out to the High Ready position and fire 1 round to the cerebellum of the brain. Return to the Ready position. Repeat 10 times. [10]
*Shooters objective - to fire one round accurately at the moment the arm's reach a full comfortable extension.
2) From the Ready position present out to the High Ready position and fire 1 round aiming for the heart. Return to the Ready position. Repeat 10 times. [10]
3) From the Holster, the SUL or continue from the Ready position, draw from the holster and present out to the High Ready position, fire one round to the cerebellum of the brain. Repeat 5 times [5]
4) From the Holster, the SUL or continue from the Ready position, draw from the holster (safely) present out and fire one round one round to the cerebellum of the brain and one round to the heart, firing two rounds each iteration. Repeat 5 times [10]
*In the next recommended shooting-drill the shooter will step left. In playing along with the scenario depicted on the target the shooter is aware and concerned for the man in the background. This causes the shooter to think about stepping left to change the angle to threat, thereby notionally clearing the background. Additionally, shooters will not rehearse stepping right on this target. However, the target MS13 w/LEO enables the shooter to rehearse stepping right.
5) From the holster, the SUL or continue from the Ready position, step left and simultaneously draw from the holster, fire one round 1 to the cerebellum and one round to the heart, firing two rounds each iteration. Repeat 10 times. [10]
6) From the holster, the SUL or continue from the Ready position, step left draw and draw from the holster . Engage with one round 1 to the cerebellum of the brain followed by 3 rounds to the heart at a rate of one round per second . Repeat 5 times. Check Targets [20]
*Safety Point for the drills 7 & 8 - ensure you have completed the turn before the gun leaves the holster and before you raise up from the SUL position. Ensure the muzzle is always pointed down range while training. Beware of flagging. Do not do these two drills from the Ready position.
7) From the Holster or the SUL position. Stand looking to left of the target and parallel to down range.
When ready turn to the right and simultaneously begin drawing from the holster, then step to the left and engage with 1 round to the cerebellum of the brain and 3 rounds to the heart. Repeat 5 times. [20]
8) From the Holster or the SUL position. Stand looking to right of the target and parallel to down range.
When ready turn to the left and simultaneously begin drawing from the holster then step to the left and engage with 1 round to the cerebellum of the brain and 3 rounds to the heart. Repeat 5 times. [20]
End Training
Clear and make safe
Total round count - 105
The next shooting drills incorporate two different MS13 targets which were designed to interact with each other. Each target depicts a mini-scenario in which the background is not clear.
Get a battle buddy - This training is best conducted with a shooting partner who can assist with calling out the next iteration of the shooting drill.
Suggested shooting drills are delineated by Novice, Intermediate and Advanced.


Learning Objectives of these two targets:
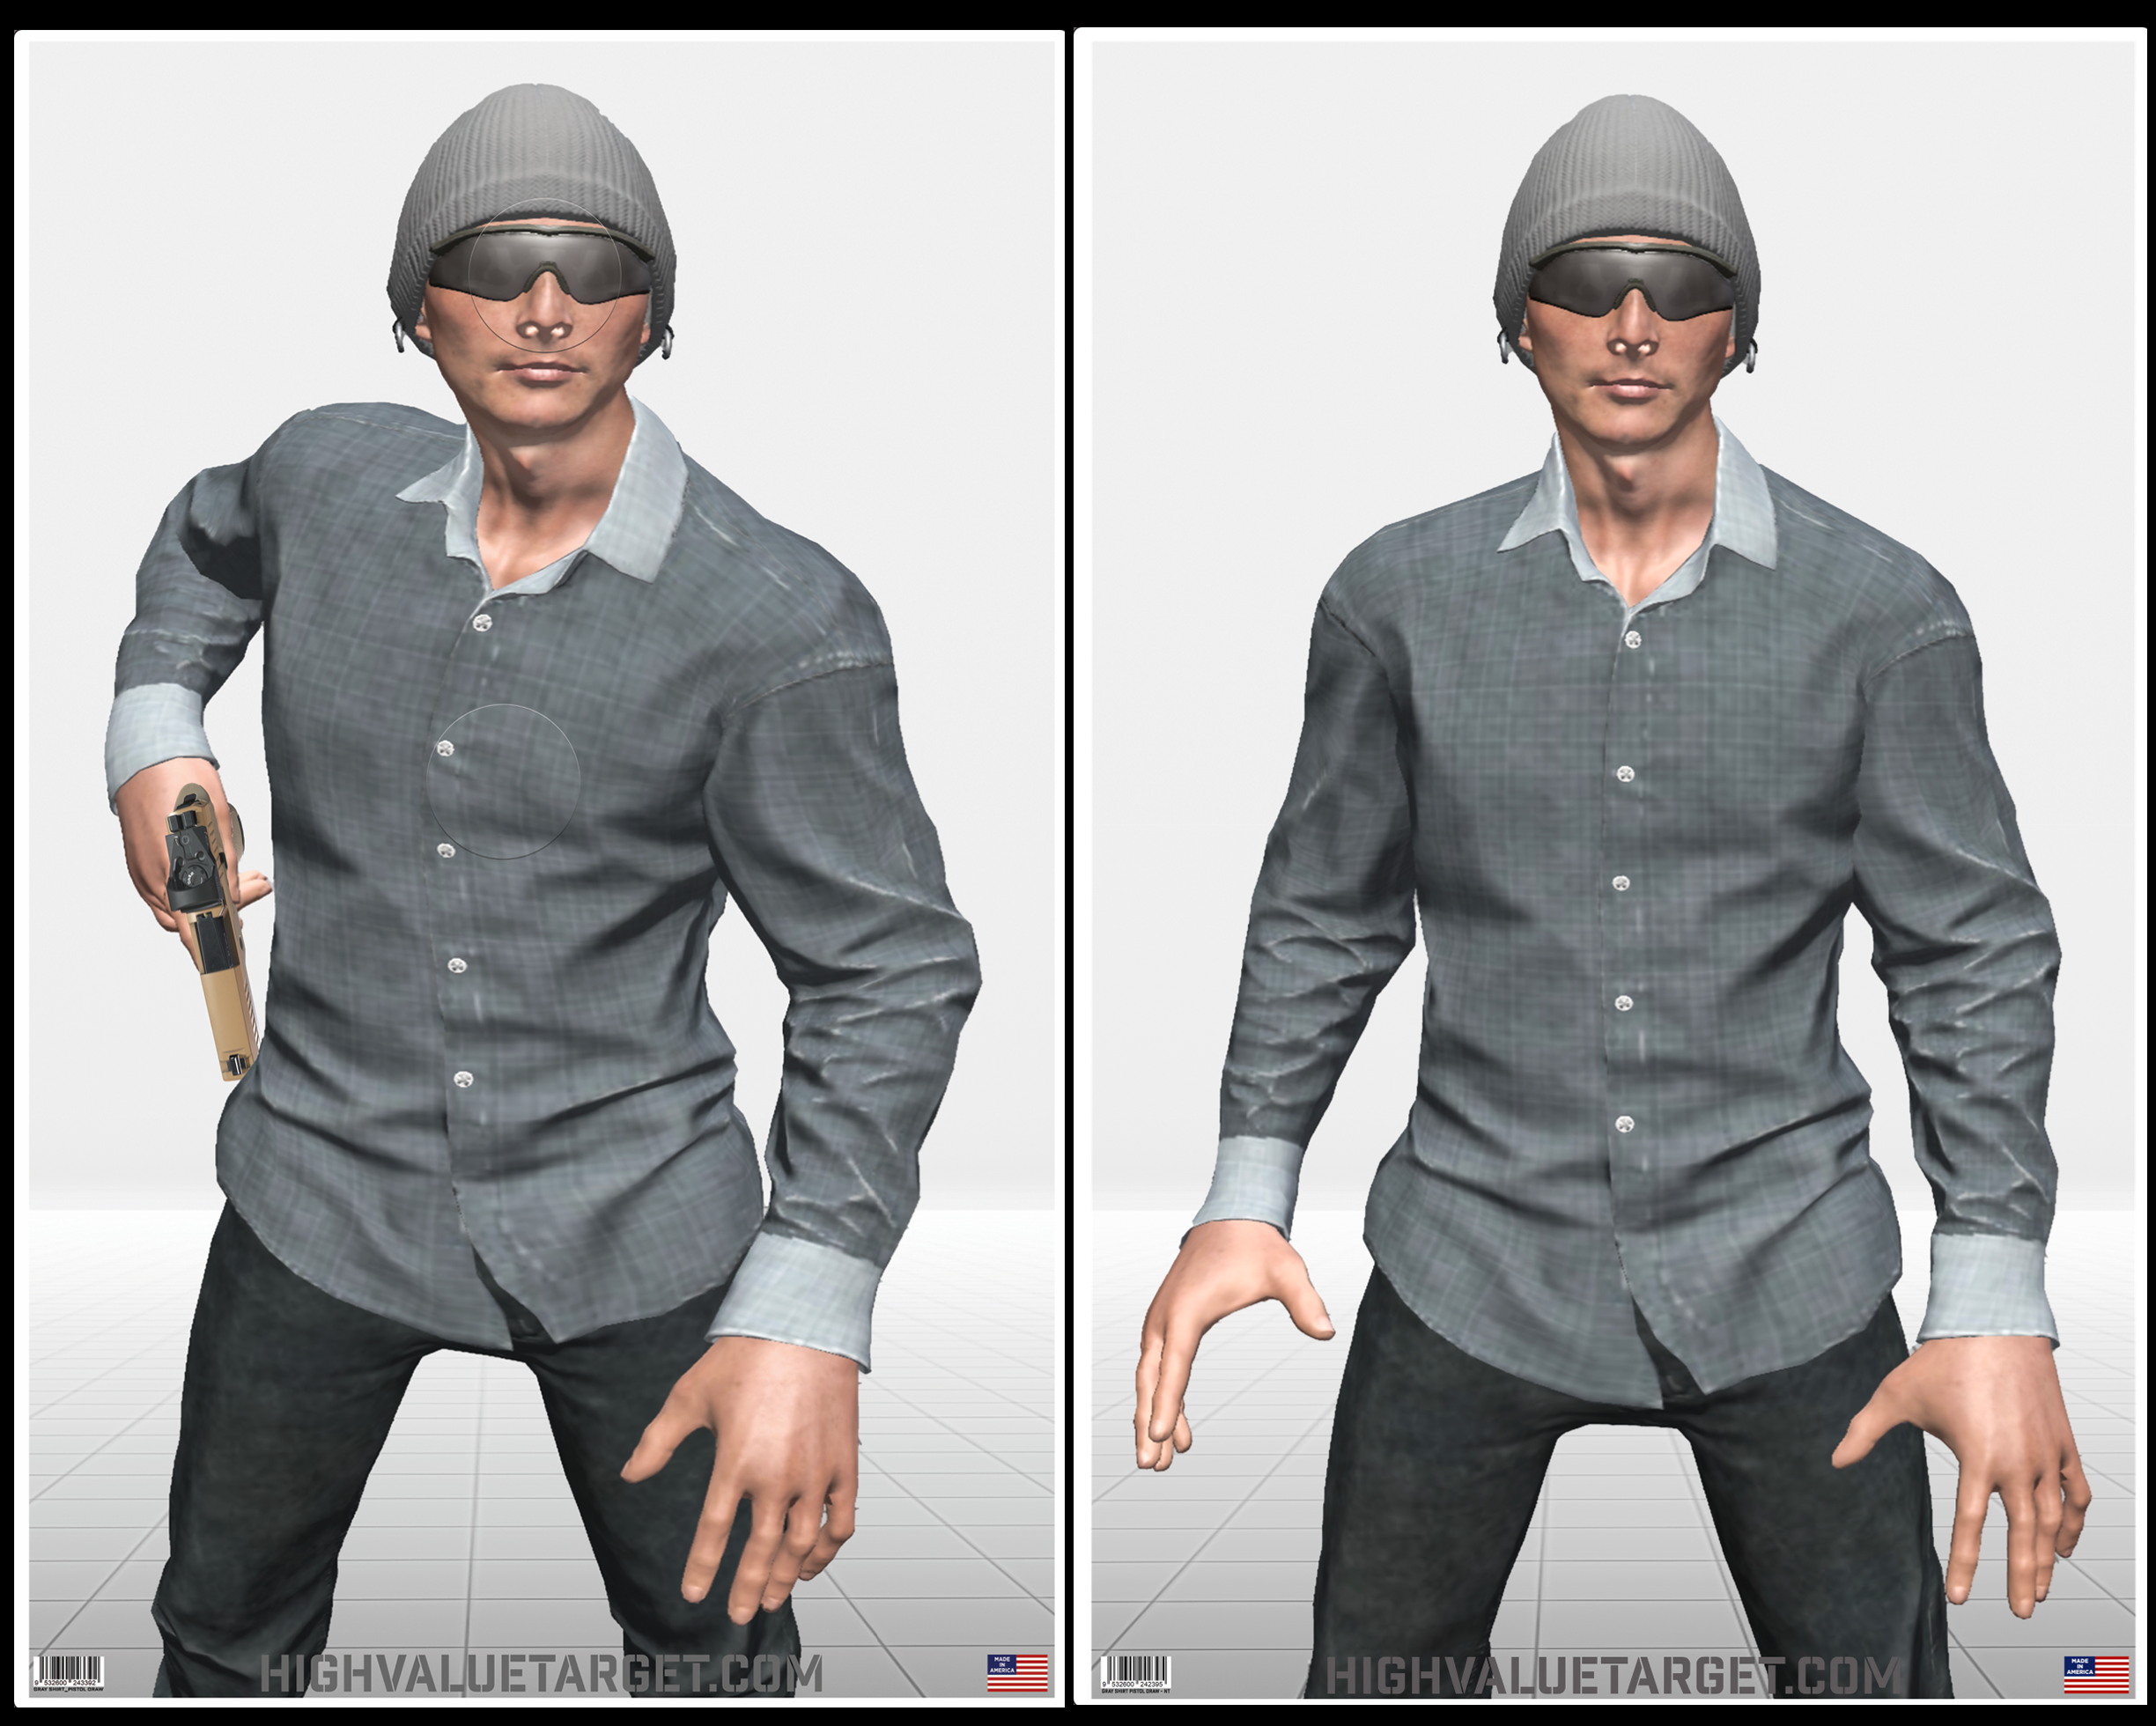
1) Check the hands. Each and every target designed at HVT depicts the hands to facilitate rehearsing and practicing checking the hands before deciding to shoot. We are truly products of our training down to the nth degree.
2) Think 3 dimensional and imagine how a bullet will travel through the body. A threat elimination zone is faintly depicted over the heart and the head. There are two places to aim for, the heart and the cerebellum of the brain.
3) Inoculation to situation. The human brain does not differentiate between imagined events and real events. These targets allow the shooter to imagine that background is not entirely clear. It's possible you may be required to take and make a shot with innocent people dangerously close to the threat. You, the shooter can significantly increase the quality of your own training by simply taking a moment to imagine the scenario as being real, even if just for a moment. These two targets are well suited for those carrying concealed, security personnel, executive protection and police officers. The drills described herein are intended to develop a programmed response through repetition and increase shooter confidence when the background cannot be entirely clear.
4) There are no lines on the target because real people do not have lines on them. Shooters, need to learn how to shoot the human body, not stay within the lines and zones. Image Processing Training™ is easily summarized with the adage, see where to shoot. Through repetition we train ourselves to immediately recognize the ideal shot placement locations, using the ears and corners of the eyes as markers. Speed and accuracy are the two most important factors when engaging a lethal threat. Each are equally important. You can't miss fast enough, is phrase often used on the range. Place just one round where it needs to be and the threat has been eliminated, this should be the objective.

5) The Psychological aspect of the target. Psychologically, there is a difference between shooting an image of an off-duty cop posing for a picture and the image of a gang-banger who would slice your liver in half. Are you shooting a "nice guy" or are you training to shoot a realistic threat? The targets you shoot should represent the threat.
There are just two places to shoot a human the cerebellum of the brain and the heart, both are approximately the size of a fist. When lines are depicted on the target the shooters attention is directed towards the lines and keeping their shots within the zones. That is psychologically different than THINKING about penetrating the heart or the cerebellum of the brain. Psychologically, training to see where to shoot is a tremendous leap forward in the science of tactical training.
6) Footwork - efficiently making turns to engage the target, as well as stepping left and right. Balance, think about your shooter stance and weight yourself slightly to the balls of your feet.
Drill #2 (below) is fairly complex. Footwork is a primary consideration during this drill. Remain balanced and slightly weighted to the balls of your feet, like a boxer or a fighter. There is a fair amount of thinking as you are turning, drawing and engaging the target.
Required Gear:
1) Holster - on the hip (recommended), duty holster, outside the waistband or inside the waistband.
2) 3 magazines, plus magazine pouch that holds two spare mags.
3) 150 rounds of ammunition
4) Eye protection/ hearing protection
5) Two MS13 targets (w/LEO and w/Suit)
Drill # 1 - getting the basics down
Difficulty - Novice
Target - MS13 w/ Suit
Ammo - 50 rounds
Load pistol magazines to capacity
Distance - 3 yards (9 feet)
Begin from the Ready position, the gun is retracted toward the torso, with elbows back and the gun leveled horizontally and pointed at the target. Or, if you are familiar with the SUL position you may use that position.
1) From the starting position present out, acquire a sight picture and fire 1 round to the head, aiming for the head, but specifically the cerebellum of the brain. Repeat 5 times. Check target hits. [5]
2) From the starting position present out, acquire a sight picture and fire 1 round aiming for the heart. Repeat 5 times. Check target hits. [5]
3) From the holster, draw and engage with one round to the heart. Repeat 5 times. Check target hits [5]
4) From the holster, draw engage with one round 1 to the head. Repeat 5 times. Check Targets [5]
5) From the holster, draw and simultaneously step Left to clear the back. Engage with one round 1 to the heart. Repeat 5 times. Check Targets [5]
6) From the holster, draw and simultaneously step Left. Engage with one round to the head. Repeat 5 times. Check Targets [5]
7) Stand looking to the left of the target. Turn to the right and simultaneously draw from the holster, then step to the left and engage with 2 rounds to the heart. *Safety Point - ensure you have completed the turn before the gun leaves the holster, ensuring the muzzle is always pointed down range while training. Repeat 5 times. [10]
8) Stand looking to the right of the target. Turn to the left and simultaneously draw from the holster, then step to the left and engage with 2 rounds to the head. *Safety Point - ensure you have completed the turn before the gun leaves the holster, ensuring the muzzle is always pointed down range while training. Repeat 5 times. [10]
Drill #2 - The MS13 Kata


ka·ta
noun:
Difficulty - Novice/ Advanced
Target - MS13 w/ Suit and MS13 w/Law Enforcement Officer (LEO)
Ammo - 100 rounds
Load pistol magazines to capacity
Distance - 3 yards (9 feet)
*Safety Point - Drill #1 is a warmup for Drill #2. If you are jumping right into drill #2 (cold) without warming up, then this drill is for advanced shooters.
*Safety Point - ensure you have completed the turn before the gun leaves the holster, ensuring the muzzle is always pointed down range while training. Repeat 5 times. [10]
Set up - In order to run the Kata as described you'll need to set up both targets next to each other about 1 foot apart and have room enough to step left and right about 4 feet each way. Set up MS13 w/LEO on the left and MS13 w/suit on the right.
1) From the holster, draw and simultaneously step right and engage with 2 rounds to the heart. Then, step left and engage with 2 rounds to the head. Repeat 10 times. Check Targets [40]
2) Stand looking to the left of the target. From the holster, turn to the right, draw and simultaneously step right and engage with 2 rounds to the heart. Then, step left and engage with 2 rounds to the head. Repeat 5 times. Check Targets [20]
3) Stand looking to the right of the target. Turn to the left and simultaneously draw from the holster, then step to the right and engage with 2 rounds to the heart. Then, step left and engage with 2 rounds to the head. . Repeat 5 times. Check Targets [20]
4) Stand looking the opposite way and 180º to the target. Turn to the left and simultaneously draw from the holster, then step to the right and engage with 2 rounds to the heart. Then, step left and engage with 2 rounds to the head. *Ensure the gun does not leave the holster until the 180º turn is completed. The gun is always pointed down range during training, no exceptions. Repeat 5 times. Check Targets [20]
END TRAINING
CLEAR AND MAKE SAFE
Target Scenario's:
MS13 target w/ LEO in the background - Mini-scenario, imagine you're a responding officer and when you arrive on scene you see she has one suspect on the ground. Surrounded by gang members and overwhelmed by the situation she has lost situational awareness and is unaware that a gang member has a machete and is throwing a sign indicating to other gang members that he intends to kill the officer any moment.
Or, use your imagination to alter the scenario however you see fit. For example, replace the police officer in the background with your wife. Imagine that you just arrived home and you came through the front door to find that your wife has a gun in her hands and someone on the floor in the living room.
MS13 target w/suit in the background - You are at a street corner, people standing around and whatnot. This guy approaches you because he didn't like the look you gave him. He is radar-locked onto you. You have a bad feeling and it's all happening so fast that you hardly have time to process. You check your background and realize there is a man standing almost directly behind the gang member who is approaching you.
Imagine that you are in a parking lot and about to open the car door when you are suddenly approached by this gang member wielding a meat cleaver. In that moment you realize he isn't interested in what you have or the keys to your car, he intends to kill you.
Through repetition we program ourselves to respond in the manner prescribed.


Leave a comment
This site is protected by hCaptcha and the hCaptcha Privacy Policy and Terms of Service apply.